
You really don't need to be a movie star or a pro athlete to get your own collectible action figure sitting on a shelf. In roughly five minutes, you can take an ordinary snapshot of yourself - or a buddy - and turn it into a shockingly realistic, packaged toy right out of a hobby store. Below, I’ve broken down the exact steps and prompt formulas that work best using DALL-E 3, which is the engine powering the image features in ChatGPT and Microsoft Copilot.
Quick Cheat Sheet: Making Your Custom Figure
What You’ll Need: ChatGPT (with DALL-E 3) or Microsoft Copilot
What It Costs: $0 (via Copilot) or included with a paid ChatGPT Plus/Pro plan
Time Commitment: Around 5 minutes
Quick Tip: The output lives or dies by how you word things. I’ve put together a plug-and-play template below so you don't have to start from scratch.
Step 1: Pick Where to Run the Prompt
Everything here hinges on DALL-E 3 because it handles packaging textures and product rendering remarkably well. You have two solid routes for getting access to it.
Option 1: ChatGPT (Paid Route)
If you're already subscribed to ChatGPT Plus or Pro, this is easily your smoothest bet. It lets you tweak prompts quickly, review your history cleanly, and generate consistently sharp renders. The free tier of ChatGPT can be hit-or-miss with image limits and older engine quirks, so stick to the paid version here if you can.
Option 2: Microsoft Copilot (The Top Free Pick)
If you don't feel like shelling out twenty bucks, head over to Microsoft Copilot instead. Copilot taps into the very same DALL-E 3 architecture under the hood, but it won't cost you a single cent. Honestly, if you're just doing this for fun on a weekend, it’s hands-down the smartest place to start.
Step 2: Grab the Prompt Template
The secret to getting that authentic toy look comes down to guiding the model with precise physical details. If you just type "make me into a toy," it’s going to spit out a mushy, generic cartoon every single time.
The Plug-and-Play Action Figure Prompt
Upload your reference picture (more on picking the right one in Step 3) and drop this right into the chat:
Create a photorealistic action figure of the person in the uploaded photo.
The figure must be full-body and placed inside a clear plastic box with a colorful cardboard background, just like a real collectible toy. The packaging should be shiny, reflective, and include a top hook for hanging.
Place these accessories next to the figure: [List 3 accessories here, e.g., "a camera, a laptop, and a microphone"].
On the box packaging:
- At the top, write in large letters: [Figure Name, e.g., "THE DEVELOPER"]
- Below that, write a short description: [Short description, e.g., "Code & Create Edition"]
The final image should be high-detail, cinematic quality, and look like a real product photo.
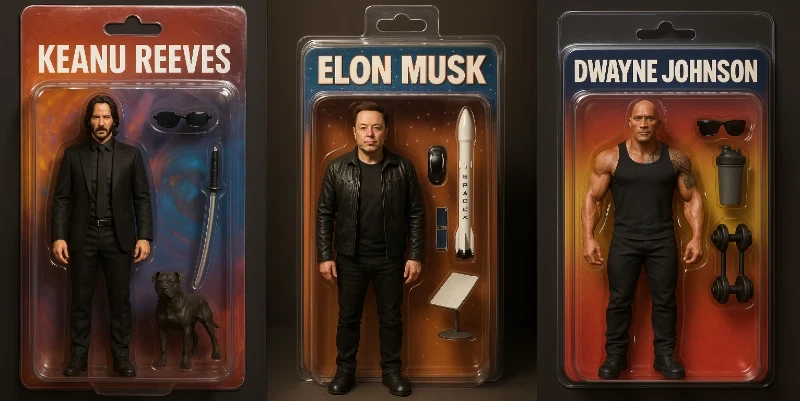
Breaking Down Why This Prompt Works
The Gear & Gadgets: Naming specific props keeps the model on a short leash. If you leave it blank, the AI tends to fill the blister pack with random nonsense you never asked for.
Titles & Blurbs: Stick to punchy, one- or two-word titles. DALL-E 3 still trips over its own feet whenever it tries to spell out full sentences (I cover quick workarounds for this down below).
Lighting & Materials: Calling out textures like "shiny, reflective plastic" and "cinematic quality" signals the model to build an actual product studio render rather than a 3D video game model. Fun fact: you can use this exact visual styling trick when you enhance product photos with Krea AI for storefront catalogs.
Step 3: Pick the Right Starting Photo
You need to feed the generator a photo so it has facial features to anchor to.
Keep the Lighting Clean and the Angle Straight
Pick a picture where your face is front-and-center, looking straight toward the camera with nice, even lighting. If you feed it a blurry selfie, a moody low-light shot, or an extreme angle, the generator just guesses your features and hands back a bland, anonymous plastic face.
Headshots vs. Full-Body: What Happened in Testing
I ran experiments with both to see which holds up better:
Headshot / Close-Up: Definitely the winner. It locks down your facial proportions and gives the generator total creative freedom to design a cohesive, toy-proportioned body and outfit around it.
Full-Body Photo: Works occasionally, but the AI gets obsessive about replicating your real-life posture, folds, and clothes. That often leaves the toy looking stiff and awkward rather than like a fun figurine. Stick with a clean headshot.
Troubleshooting: How to Fix the Weird Glitches
Let’s be real: AI almost never nails everything on the first try. Expect a couple of wonky outputs, and use these workarounds when things go sideways.
Issue: The Packaging Text Looks Like Alien Script
This happens constantly. When I was testing this, I asked for a clean title and still ended up with doubled letters and weird typos. Generative models simply aren't built to be flawless typographers yet.
- The Easy Fix: Stop wasting prompts trying to get the AI to fix a typo. Just save the render with the best-looking figure, pop it into Canva or Adobe Express, and paste a clean text box right over the messed-up header. It takes twenty seconds. And if you run into little cosmetic issues like messy edges or weird hairlines, you can always add hair with AI in Photoshop to tidy things up.
Issue: The Figure Doesn't Look Quite Like You
When the face comes out looking like an NPC instead of you, the reference image didn't give the AI enough clear data to work with.
- The Easy Fix: Grab a sharper photo with brighter lighting and try again. And remember, generation has built-in randomness - sometimes just hitting "regenerate" on the exact same prompt produces a much tighter match on run two or three.
Issue: You Got Completely Random Accessories
You asked for a mirrorless camera and it gave you a miniature saxophone.
- The Easy Fix: Get more descriptive with your words. Swap "a camera" for "a matte-black DSLR camera with a strap." If the generator still refuses to listen, strip the accessories out of the initial prompt entirely, generate a clean box, and use inpainting inside something like Google's ImageFX to drop your gear into the plastic tray afterward.