Quick Solution If you already know the name of the environment and have deactivated it, run this command in your terminal:
conda remove --name myenv --all
(Replace myenv with your actual environment name)
Keeping your Conda environments organized is crucial for a clean development workflow. Over time, test environments and old project dependencies can clutter your disk space. Removing an unused Conda environment is a straightforward process, but there are a few nuances, like the --all flag, that are essential to ensure a complete deletion.
This guide covers the standard removal method, how to delete path-based environments, and how to clean up leftover cache files.
Step 1: Verify the Environment Name
Before deleting anything, you need to be sure of the exact name of the environment. Deleting the wrong environment can result in lost work.
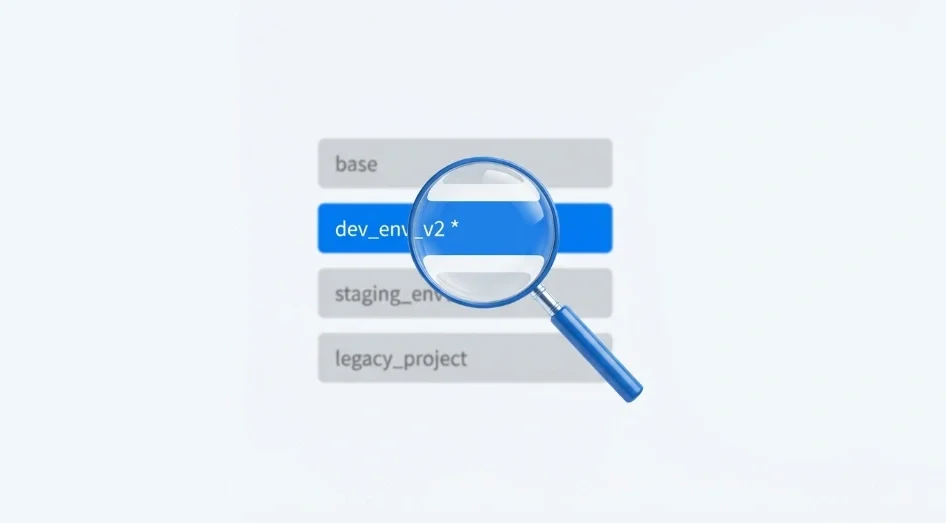
To see a list of all environments currently on your system, you should **list all available environments** using the terminal.
conda env list
# or
conda info --envs
This command will display a list where the active environment is marked with an asterisk (*). Note the name of the environment you wish to remove.
Step 2: Deactivate the Environment
You cannot remove a Conda environment while you are currently inside it. If you try to delete the active environment, Conda will throw an error.
First, check your terminal prompt. If it shows (myenv), you need to return to the base environment:
conda deactivate
If you are using an older version of Conda (pre-4.6), you might need to use source deactivate instead.
Step 3: Remove the Environment
Once you have the name and have deactivated the environment, you can proceed with the deletion. The command requires the --name (or -n) flag followed by the environment name, and crucially, the --all flag.
Run the following command:
conda remove --name my_env_name --all
Why is the --all flag important? If you omit --all, Conda might try to remove a specific package named my_env_name from your current environment instead of deleting the environment itself. The --all flag tells Conda to remove the entire environment definition and all installed packages within it.
Alternatively, you can use the env remove alias, which does the same thing:
conda env remove -n my_env_name
How to Remove an Environment by Path (-p)
Sometimes, environments are created in a specific directory (using the -p flag) rather than by name. These environments will appear in your list with a full file path instead of a short name.
To remove these, you must specify the path using the -p flag instead of -n:
conda remove -p /path/to/your/environment --all
You can find the correct path by checking your environment list again or by using Python to **print current directory** if you are unsure of your location structure.
Free Up Disk Space with Conda Clean
Removing the environment deletes the reference and the files in the envs directory, but it might not remove the cached package tarballs that were downloaded. If your goal is to free up disk space, you should run the clean command after removing your environments.
conda clean -a
This command removes unused packages and caches. It is a safe and effective way to reclaim storage.
Location for Image: Place this image right after the Step 3: Remove the Environment section to visually confirm the expected output.
Troubleshooting Common Issues
Environment Not Found Error: If you see an error saying the environment was not found, double-check the spelling. Environment names are case-sensitive. Run conda env list again to copy the exact name.
Permission Denied: If you are on Windows or managing a system-wide installation, you might not have permission to delete the folder. Try running your terminal or Command Prompt as Administrator.
Environment Still Appears in List: If the environment is deleted but still shows up in the list (without files), it might be a leftover metadata issue. You can manually navigate to your Anaconda envs directory and ensure the folder is completely gone.
If you accidentally deleted the wrong environment, don't worry. As long as you have your environment.yml file or know the requirements, you can easily **create a new environment** and restore your workflow.