Seeing "Error Code 0x0003" when you try to open GeForce Experience is frustrating, but it's almost always fixable. This error simply means the application can't communicate with the core NVIDIA services running on your system. This guide will walk you through every solution, from the simplest service restart to a full clean install, to get you back up and running.
Quick Fixes: Try These 3 Steps First
Let's try the three fastest solutions.
Restart Your Computer: This sounds simple, but it frequently works by clearing temporary system conflicts that may be blocking the services.
Run GeForce Experience as an Administrator: Right-click the app icon and select "Run as administrator." This is a quick way to rule out permissions issues.
Check Your NVIDIA Account: This is a fix many users (myself included) have found helpful. Open the application, log out of your NVIDIA account, and then log back in. This can sometimes re-establish a broken connection.
Solution 1: Check and Restart NVIDIA Services (The Most Common Fix)
This is the most frequent cause of Error 0x0003. The background services that GeForce Experience depends on have either stopped or failed to start with Windows.
How to Check Your NVIDIA Services
Press the Windows Key + R on your keyboard to open the "Run" dialog.
Type
services.mscand press Enter.
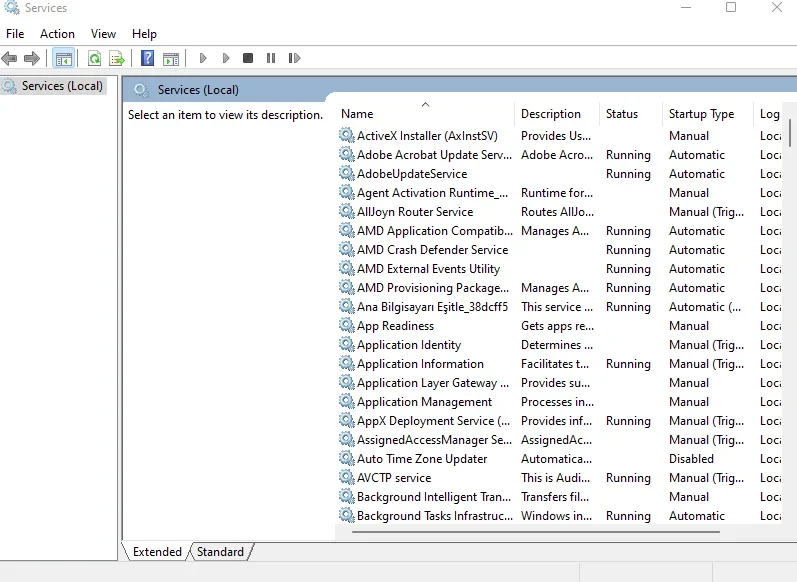
The 4 Key Services to Check
In the Services list, scroll down and find these four services. It is critical that all four are active and show "Running" in the Status column:
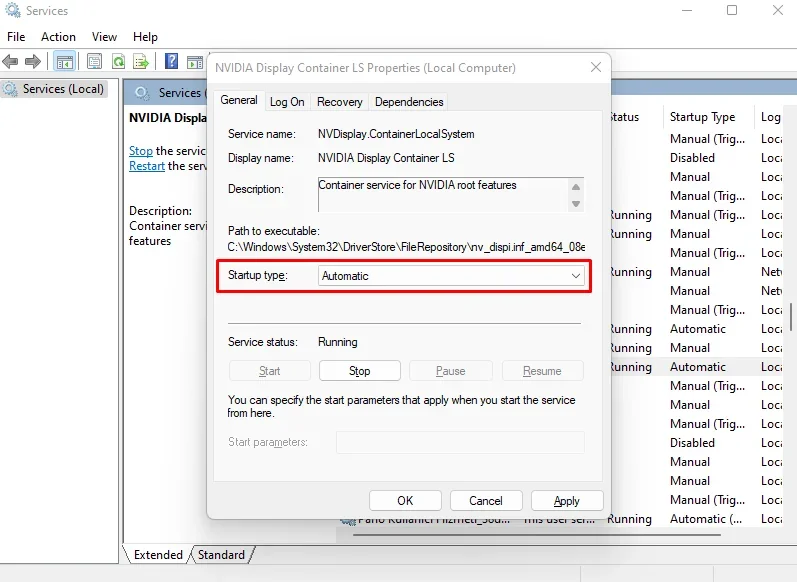
NVIDIA Display Container LS
NVIDIA LocalSystem Container
NVIDIA NetworkService Container
NVIDIA Telemetry Container
How to Restart and Set Services to 'Automatic'
If any of those services are not marked as "Running," follow these steps:
Right-click on the stopped service and select Start.
For a permanent fix, right-click each of the four services one by one and select Properties.
In the Properties window, find the "Startup type" dropdown menu.
Set the "Startup type" to Automatic.
Click Apply.
After you have done this for all four services, restart your PC and check if the error is gone.
Solution 2: Fix Network Configuration and Driver Conflicts
If the services were already running, the next step is to check for network or driver-level conflicts.
Reset Your Network Configuration (Winsock Reset)
A network configuration conflict can sometimes block the NVIDIA services from authenticating properly.
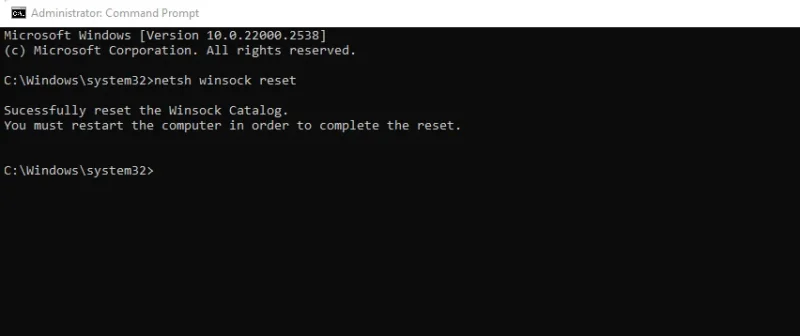
Open your Start Menu and type "cmd".
Right-click on "Command Prompt" and select "Run as administrator".
In the black window, type
netsh winsock resetand press Enter.You must restart your computer for this to take effect.
Reinstall or Update Your Graphics Driver
The error might be caused by a corrupted driver installation.
Go to the official NVIDIA Drivers website.
Manually select your graphics card model and download the latest driver.
Run the installer. When given the choice, select Custom (Advanced).
On the next screen, check the box that says "Perform a clean installation."
This process is essential as it removes old, conflicting profiles and settings that a standard update might leave behind.
Solution 3: The "Last Resort" Fix (Using DDU for a Full Clean Install)
If all the solutions above fail, the problem is likely a deeply corrupted driver or registry entry. This "nuclear" option involves using Display Driver Uninstaller (DDU), a tool that completely wipes every trace of NVIDIA from your system.
Warning: Only follow these steps if you are comfortable with advanced troubleshooting. This is a powerful tool.
Download the latest driver from NVIDIA's site, but do not install it yet. Save it to your desktop.
Download Display Driver Uninstaller (DDU) from its official website (guru3d.com).
Restart your computer in Safe Mode. This is a critical step; DDU will not work correctly otherwise.
Run DDU. Select "GPU" as the device type and "NVIDIA" as the manufacturer.
Click the "Clean and restart" button.
Your computer will restart in normal mode. It may be in a low resolution, which is normal.
Now, run the new driver installer you downloaded in Step 1.
Specific Fixes for Windows 11 & Related Errors
For Windows 11 Users
Many Windows 11 users report this error appearing after a major OS update. If you are on Windows 11, try these two steps in addition to the solutions above:
First, go to Settings > Windows Update and check for any pending updates or patches. Install them and restart.
Second, ensure your .NET Framework is updated. Go to Settings > Apps > Optional features and ensure the latest .NET versions are installed and enabled.
What About Error Code 0x0002 or 0x0001?
These errors (0x0002, 0x0001) are part of the same family as 0x0003. They are all related to the same NVIDIA service failures. The solutions in this guide, especially Solution 1 (Checking Services) and Solution 3 (DDU), will also fix these related error codes.