Gone are the days of struggling with dual-boot systems or sluggish Virtual Machines just to run a few Linux commands. If you need a seamless Linux environment directly on Windows, WSL 2 (Windows Subsystem for Linux 2) is the industry standard solution. It runs a real Linux kernel alongside the Windows kernel, offering full system call compatibility and significantly faster file system performance.
This guide cuts through the noise and covers not just the "happy path" installation, but also the real-world virtualization errors developers often face during setup.
Prerequisites: Before You Start
Most installation failures (specifically error 0x80370102) happen because the system isn't actually ready for virtualization. Before pasting any commands, we need to verify your environment.
First, check your Windows version. Press Windows Key + R, type winver, and hit Enter.
Windows 10: Must be version 2004 or higher (Build 19041+).
Windows 11: All versions are supported.
Second, and most critically: Virtualization must be enabled in your BIOS/UEFI. Open Task Manager, switch to the Performance tab, and look at the CPU section. Ensure it says Virtualization: Enabled. If it shows "Disabled," you must restart your computer, enter BIOS (usually F2 or Del), and enable Intel VT-x or AMD-V.
If you need to configure your system deeper, ensuring you enable Hyper-V correctly is often the missing link for a stable environment.
Method 1: Automatic Installation (Recommended)
Microsoft has simplified the process into a single command for modern Windows builds. This method works for 90% of users on updated systems.
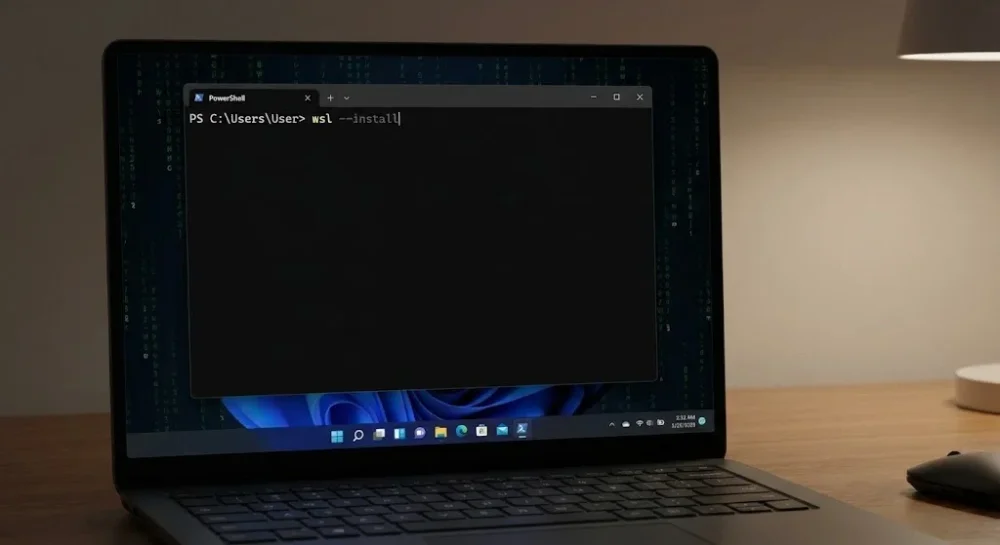
Search for PowerShell in the Start menu.
Right-click and select Run as Administrator.
Paste the following command and press Enter:
wsl --install
This command automatically performs the following background tasks:
Enables required optional features (Virtual Machine Platform).
AdvertisementDownloads the latest WSL 2 Linux kernel.
Installs Ubuntu as the default distribution.
Once the process finishes, restart your computer. After the reboot, a terminal window will open automatically to finalize the installation.
Method 2: Manual Installation (The Old School Way)
If the automatic command fails or you are on an Enterprise build, the manual method is the reliable fallback. It also gives you better visibility into which step might be failing.
Step 1: Enable the Linux Subsystem Open PowerShell as Administrator and run:
dism.exe /online /enable-feature /featurename:Microsoft-Windows-Subsystem-Linux /all /norestart
Step 2: Enable Virtual Machine Platform This is the engine that powers WSL 2:
dism.exe /online /enable-feature /featurename:VirtualMachinePlatform /all /norestart
Restart your computer at this stage to apply changes.
Step 3: Set WSL 2 as Default Once back in Windows, open PowerShell and enforce version 2 as the default:
wsl --set-default-version 2
Step 4: Install a Linux Distribution Open the Microsoft Store and search for Linux. Select a distribution like Ubuntu 22.04 LTS or Debian, and click Get.
Post-Installation Setup: Best Practices
After installation, the Ubuntu (or chosen distro) terminal will launch. It may take a few minutes to decompress files on the first run.
Set Username and Password: You will be prompted to create a UNIX username and password. This is separate from your Windows credentials. Note that when typing the password, no characters will appear on screen. This is a standard Linux security feature; just type and hit Enter.
Update Your Packages: The first rule of Linux is to keep your package list fresh. Run this command:
sudo apt update && sudo apt upgrade
You now have a fully functional Linux terminal. To navigate the file system effectively, you might want to brush up on how to search for a file in linux. For server management tasks like monitoring logs, the linux tail command will be one of your most used tools.
Essential Optimizations for Developers
To use WSL 2 like a pro and prevent it from slowing down your host machine, apply these configurations.
1. Limit RAM Usage (.wslconfig) By default, WSL 2 can consume nearly all available host RAM. To prevent the Vmmem process from hogging resources:
Navigate to
C:\Users\YourUsername\in Windows Explorer.Create a file named
.wslconfig.Add the following configuration (example for limiting to 8GB):
[wsl2]
memory=8GB
processors=2
2. VS Code Integration Don't edit Linux files using Windows Notepad. Instead, install the Remote - WSL extension in VS Code. Navigate to your project folder in the Linux terminal and type code .. This opens VS Code in Windows, but it operates directly on the Linux file system, offering the best of both worlds.
Troubleshooting Common Errors
Error 0x80370102 This almost always means virtualization is disabled in BIOS. Refer back to the Prerequisites section and check your BIOS settings.
WslRegisterDistribution failed with error: 0x800701bc This error indicates an outdated kernel. Download and install the "WSL2 Linux kernel update package for x64 machines" from Microsoft's official documentation to fix it.
No Internet Connectivity If the network inside WSL drops, resetting the instance usually resolves it. Run this in PowerShell: wsl --shutdown
With these steps complete, you can now seamlessly switch between environments without the hassle of dual-booting, leveraging the full power of different operating systems right from your desktop.